UGEARS Aero Clock Assembly - A Customer's Comments and Helpful Tips
Dear UGears Enthusiasts!
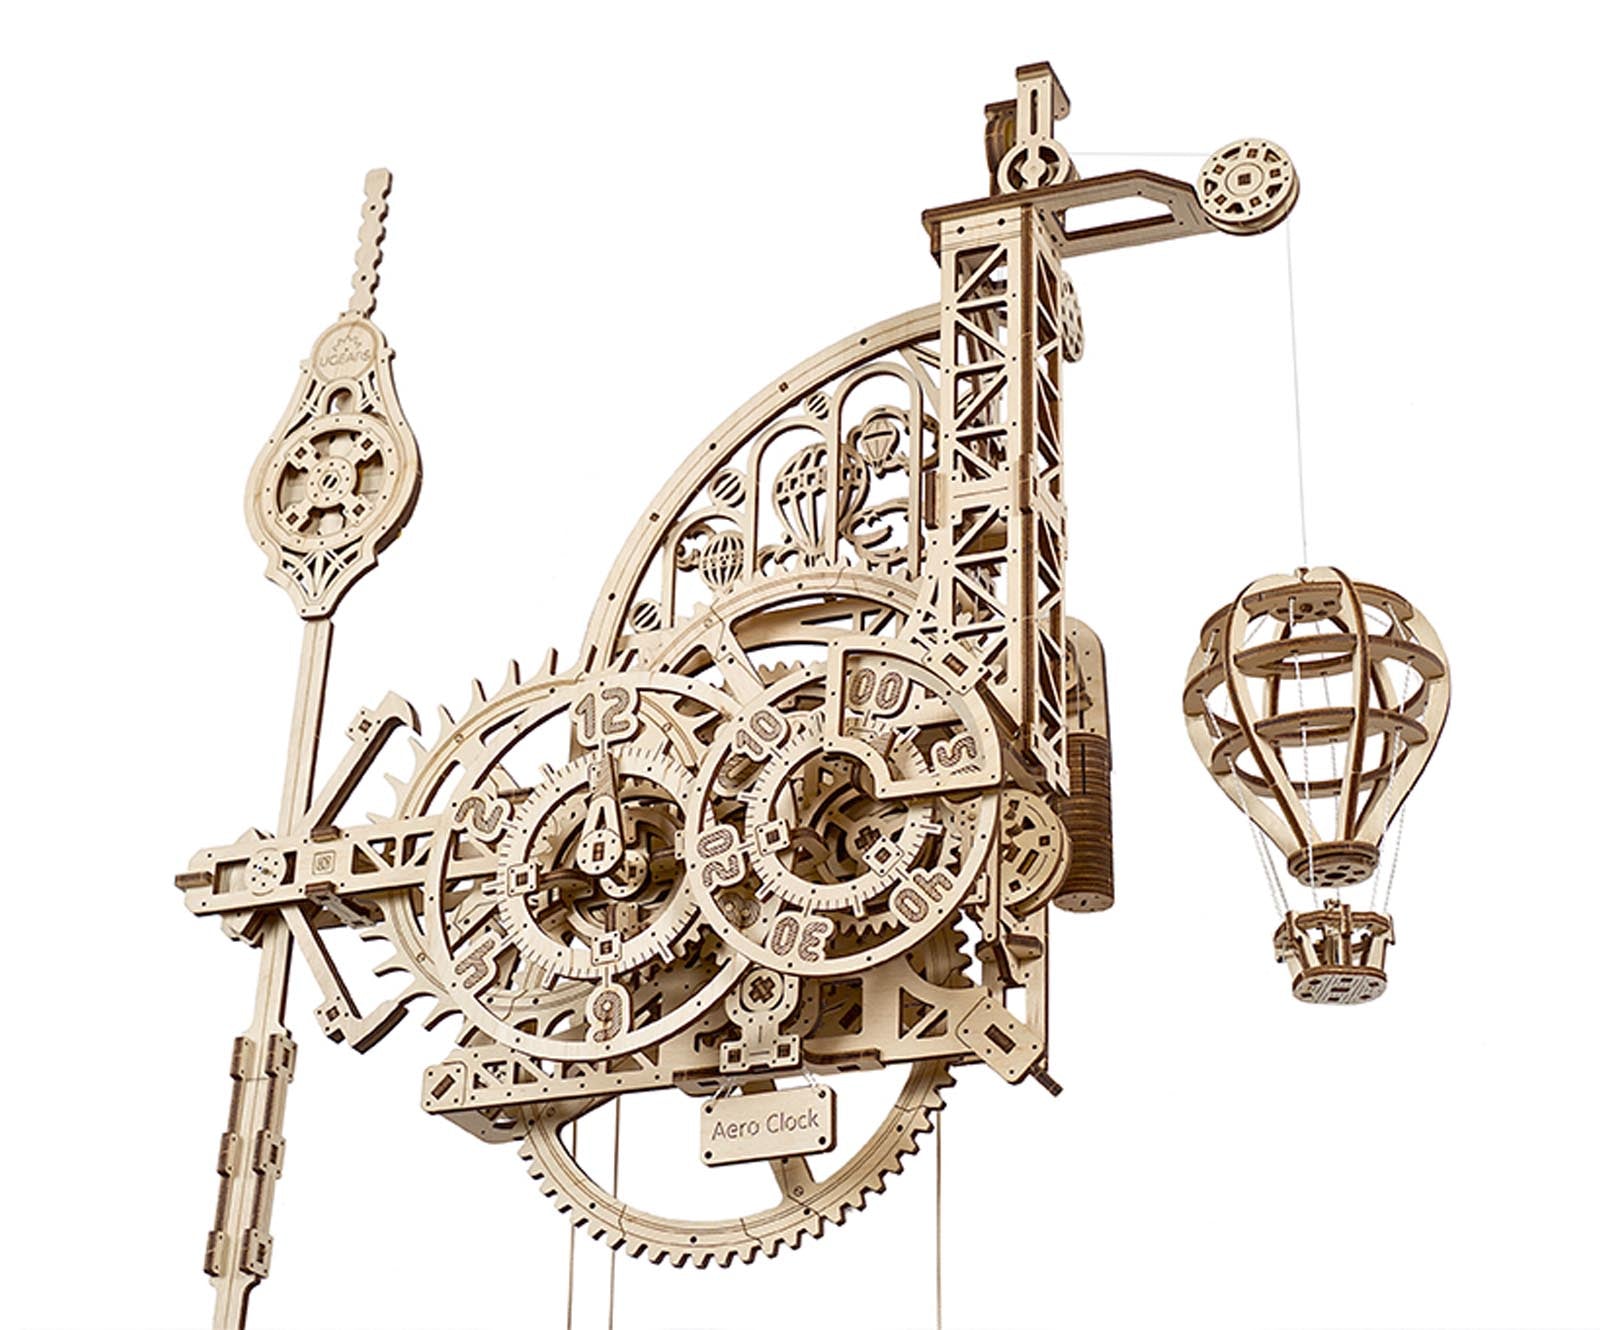
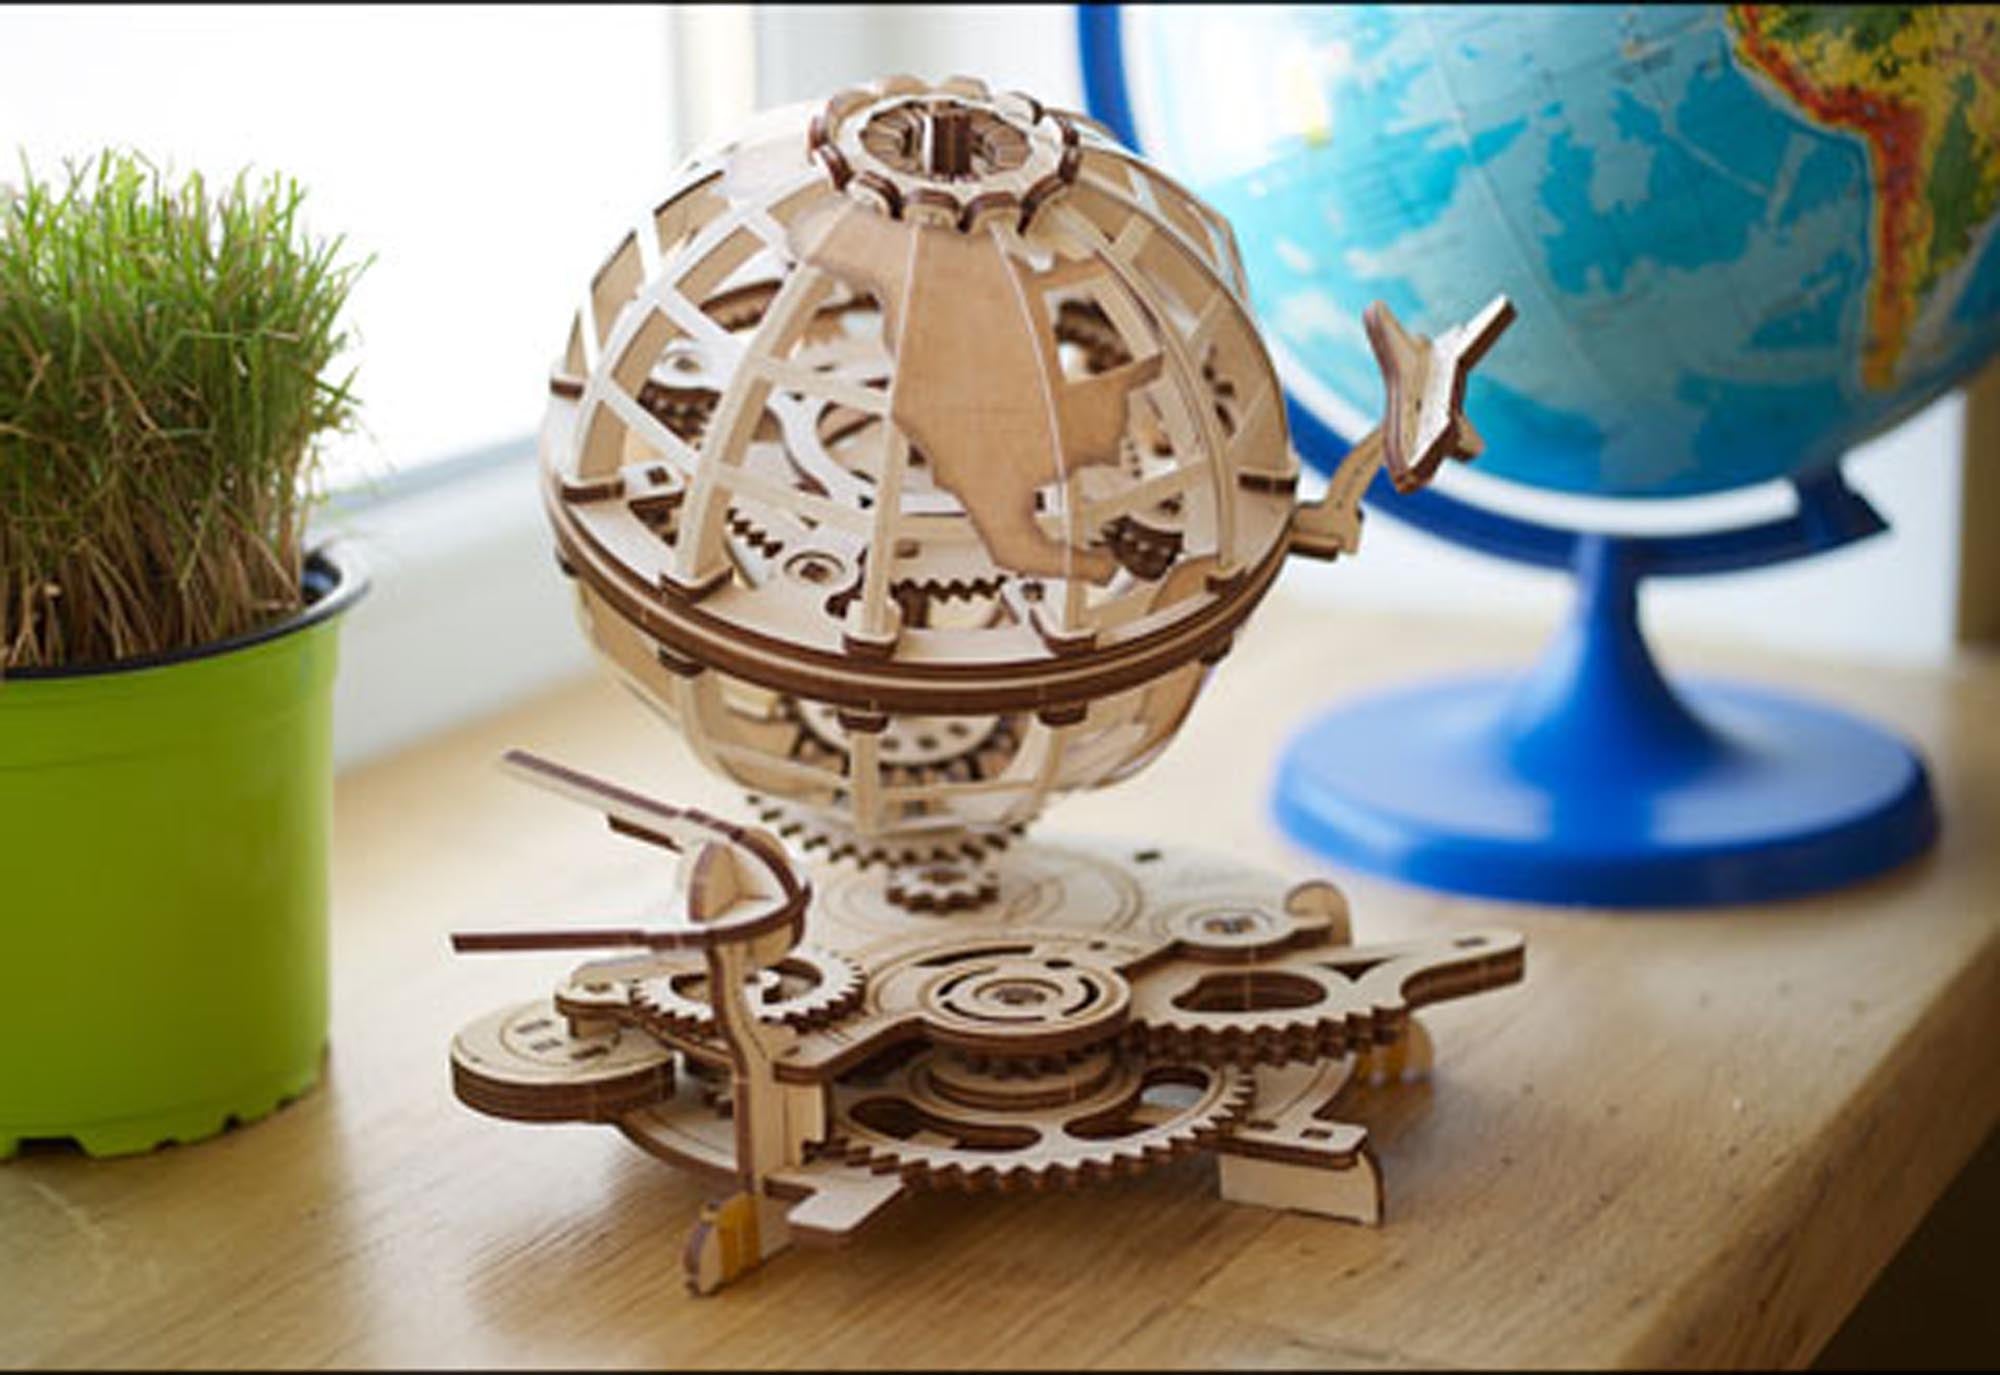
UGears Aero Clock is one of the most complicated models we carry in our mechanical series. Many people reach out for awareness and ask us their questions on the assembly. One of our customers, Glenn M, a retired aircraft mechanic of 44 years, was kind enough to share his experience assembling the Aero Clock.
Please enjoy the read as you'll find many helpful tips in this article.
-------------------------------

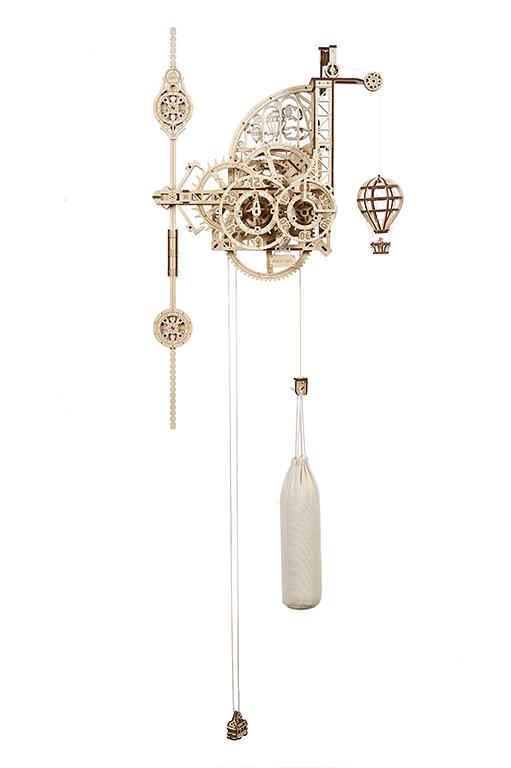
Assembly of the Aero Wall Clock
Author: Glenn M
Published: March 2022
I had never heard of UGEARS Models until I happened upon a display of UGEARS models in a toy store recently. I purchased the Aero Wall clock. I was impressed with the assembly manual and the quality of the parts! My clock works perfectly with the balloon descending on the hour and going back up little by little before it descends again on the next hour. My clock lasts 24 hours before having to wind it again.
It keeps accurate time losing 1 minute in 24 hours as advertised. I am very impressed with the clock having all the wooden parts.
Here is what I learned during the assembly of the clock.

-
Read ahead of the instructions so you can see how assemblies go together.
-
Pay attention to detail and take frequent breaks, double-check your work. Most importantly be patient and take your time to savor the build experience.
-
I used paraffin wax on all the gears, rotating parts, and the tabs that insert into other parts.
-
The winding of the cord for the main drive wheel may seem complicated. Pay attention to the manual and diagrams. One cord gets tied to the frame to form a loop that the trolly rides on. The other string is what the weight hangs on. The two ends are wound in opposite directions from each other. Make sure rotating parts and gears mesh correctly and move freely and run straight as you assemble. If they do not correct the issues before continuing.
-
I initially left the balloon and counterweight and associated parts off and made sure the basic clock was operating first.
-
 I made sure the gears ran freely and smoothly and straight by pulling down on the cord the weight attaches to. I corrected issues as required before continuing.
 -
I had an issue with the wheel the cord wraps around. It was jamming and not free for rewinding. I found one of the metal gear shafts was hitting the wheel. I moved the gear shaft pin to be flush on the backside of the gear and then the rewind worked perfectly.
-
I initially had the pendulum upside down and the clock kept stopping. Once I reassembled the pendulum correctly the clock worked great! Pay attention to the manual.
-
The balloon seemed confusing for the cord routing at first. Both cords go straight up then the cord for the balloon goes to the right as you face the clock and over the pulleys and then the balloon gets attached. The other cord goes over the pulleys in the back and then the counterweight gets attached. Make sure both cords are straight and not twisted as they go up.
-
I then carefully removed the wheel the balloon and counterweight cords attach to. Then you only wind the counterweight cord counterclockwise around the wheel three full turns and then install the wheel. The balloon cord does not get wound around the wheel it just goes straight up. So now what happens is as time moves forward the balloon goes up and the counterweight goes down.
-
It took a little tinkering to get the pendulum set so the clock keeps time. The upper weight is a course adjustment moving it down makes the clock faster and moving up makes it slower. The bottom weight is a fine adjustment up is faster and down is slower.
I want to thank the UGEARS support and engineers for a fun clock that works well! I am 70 years old and a retired aircraft mechanic of 44 years. I have always enjoyed machines figuring out how they work and what to do to fix them when they do not work. I hope this may be of help to some of you.
Glenn M

From UGears.US team: we would like to thank Glenn for documenting and sharing his invaluable feedback.
Troubleshooting Sky Watcher Tourbillon Table Clock Assembly
UGears Assembly Videos from DragonflyPuzzles
Related Posts

New UGears Star Wars™ Collection Has Landed!

Explore the Wonders of Space with UGears NASA Models 🚀✨

New Collection of UGears Mini Models
2023 Licensing International Excellence Awards Finalist - UGears Harry Potter™ collection!

Ugears awarded "Best Product of the Year" from Warner Bros. for its Harry Potter™ collection of mechanical models
Presenting 2.5D Mechanical Puzzles
Presenting Marble Run Tiered Hoist!

1 Comment
This kit looks very intriguing and challenging. It does not have the regular clock face of a clock that has the 12 hours going clockwise from 1 through 12. I will need some guidance as to how to read the time of day,
Thanks.
Bob Steckley